HSM4 (legacy): Quickstart and Integration
The HSM4 is a ‘snap in’ security module designed for easy integration within a secure manufacturing environment. All connections are through a single, 30 pin connector that is hidden underneath the module. It is designed specifically to work with Raspberry Pi embedded applications. A PiZero HAT (Hardware Attached on Top) adapter is available for easy integration to the standard GPIO pins of the Pi.
In this Getting Started guide we describe how to install your HSM to a Raspberry Pi running Raspbian or Ubuntu. The installation process is the same for both of these Linux distributions.
Diagram of HSM placement on PiZero HAT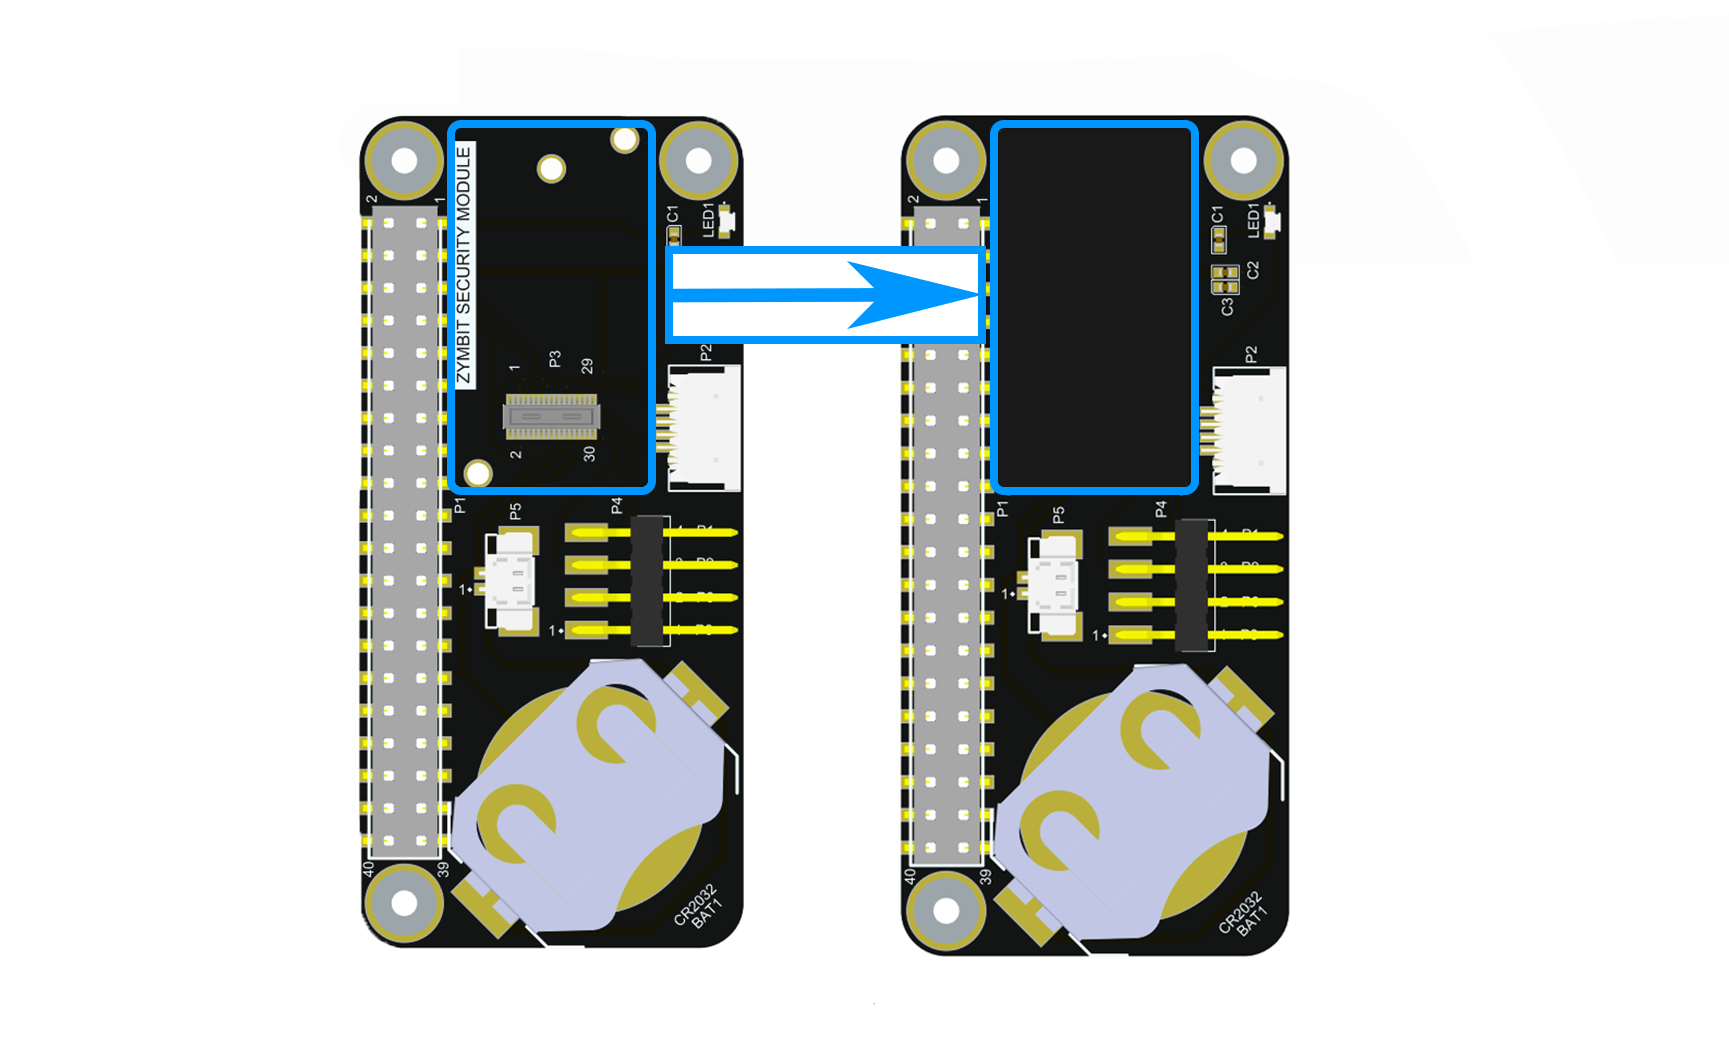
Summary of Setup Steps
- Installing the Hardware
- Install the HSM on the PiZero HAT. Install the battery on the HAT. Connect the HAT to the host single-board computer.
- Establish an I2C connection
- Enable the I2C bus on the host device in order to be able to communicate with the HSM.
- Install the Zymbit Driver Package
- These utilities provided by Zymbit are necessary to interact with the hardware module.
- Test the installation
- Your HSM is now temporarily bound to your SBC and ready for use in developer mode.
Installing the hardware
HSM to PiZero HAT
Fit your HSM onto the PiZero HAT (Hardware Attached on Top). The connector plugs into the pins on the board.
Battery Installation
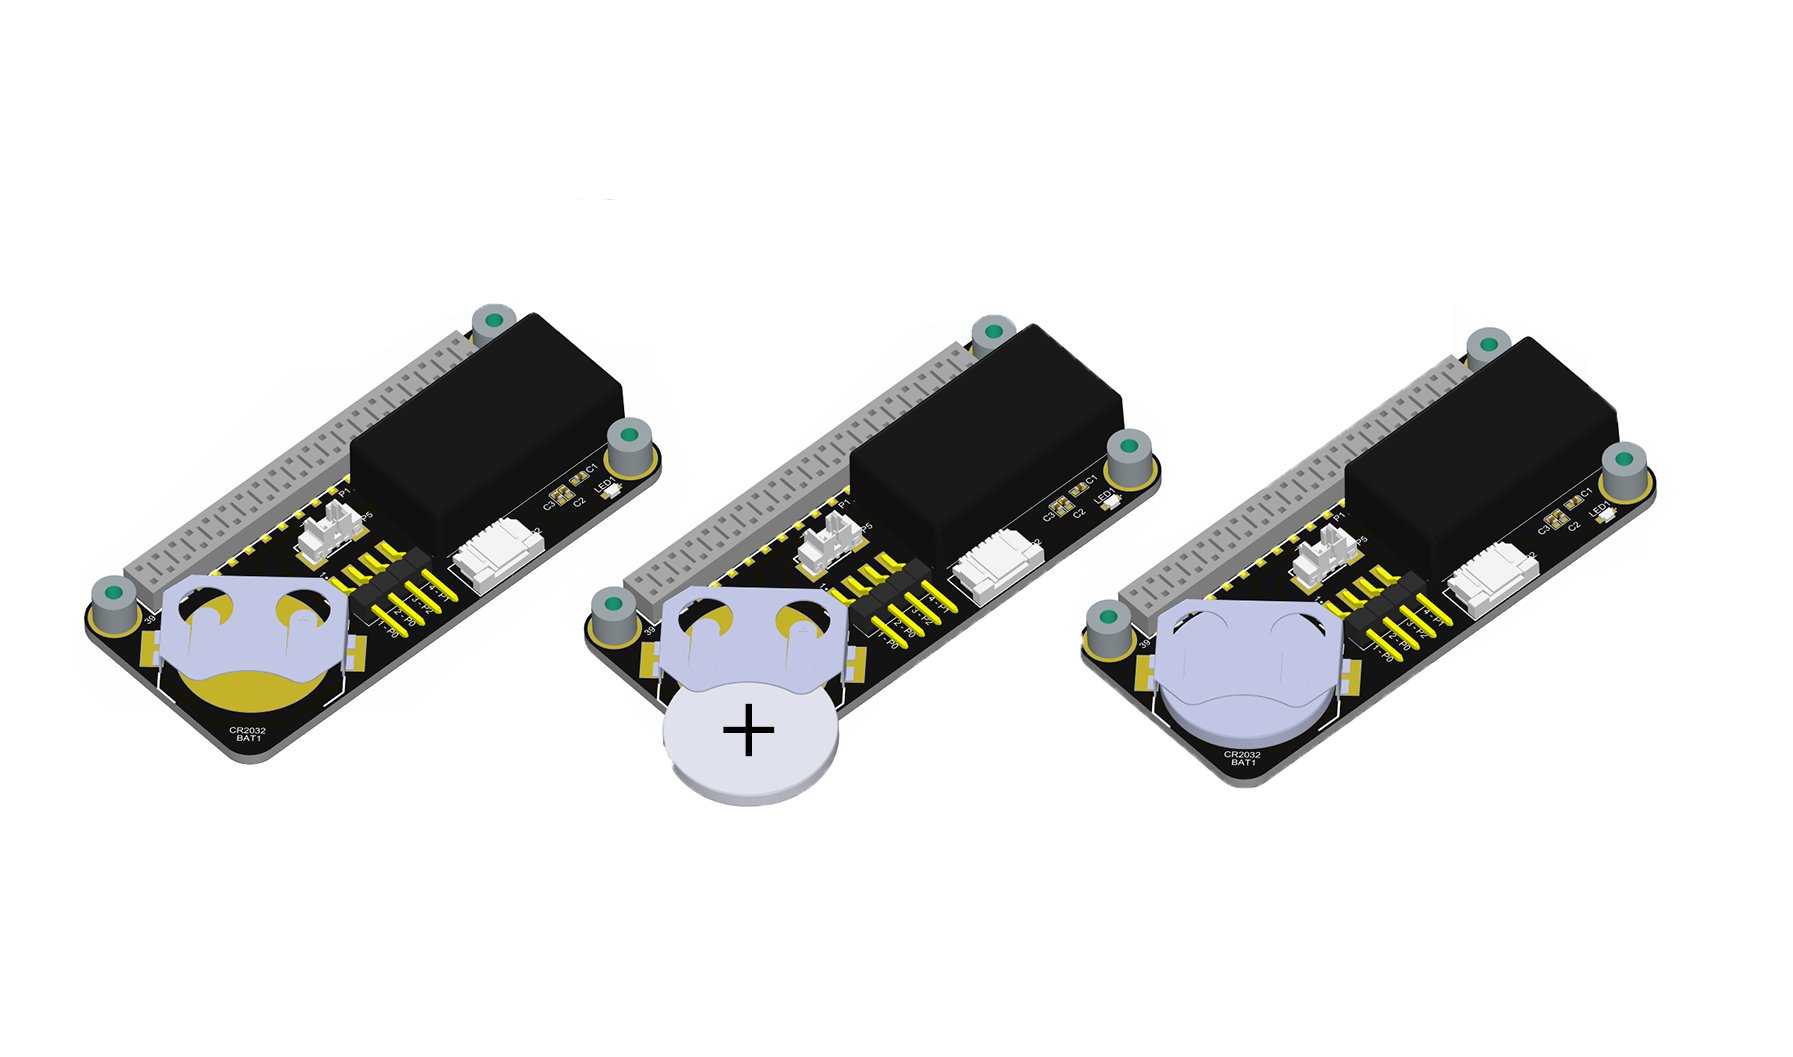
To maintain the real-time clock (RTC) and tamper detection features in the event of power loss, your PiZero HAT can be fitted with a 3V CR2032 coincell. This battery should last 3-5 years. We recommend using a high quality one like this.
Primary Battery Holder (Recommended)
IMPORTANT: Note the correct polarity with +ve facing upwards !!
Optional Battery Connector (Alternative)
Caution: Ensure you select the right connector type– Molex 51021-0200-B (1.25mm Pitch). You can purchase the battery here.
Battery should look like this:
Mating component specifications:
Plug wired CR2032 battery into optional battery connector, located below.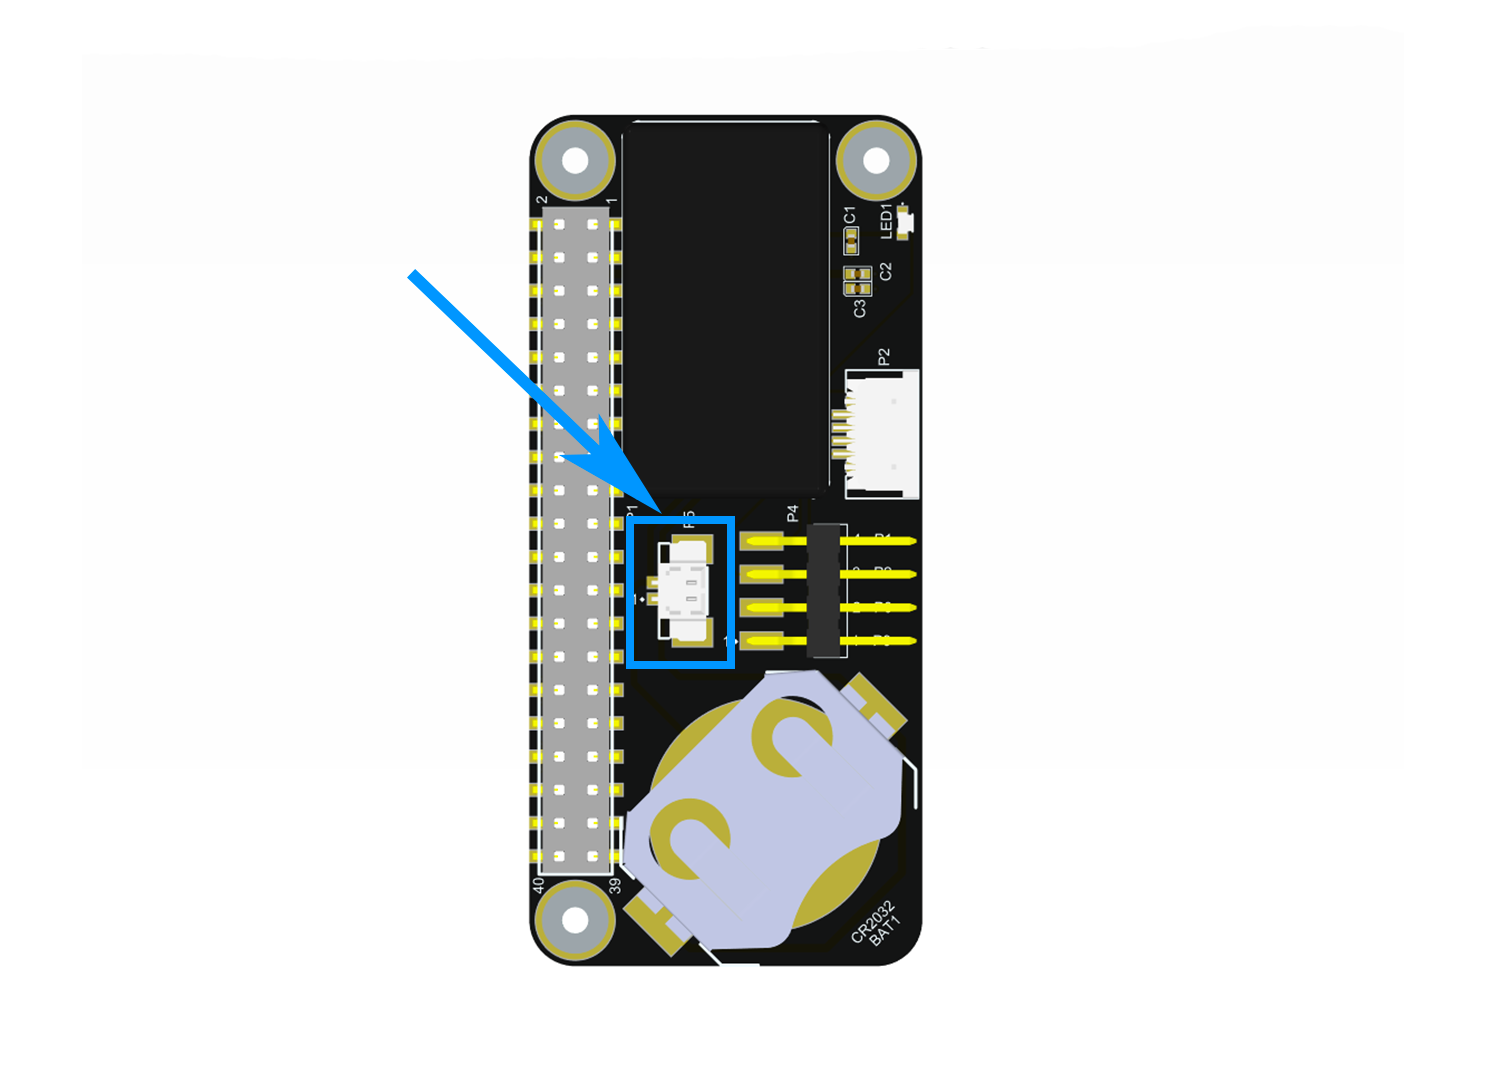
Install Pi HAT with HSM (and battery)
Installing your hardware correctly is important to avoid destroying your SBC or PiHAT. Be sure to follow the instructions below carefully. In particular:
- Pay close attention to the images below to ensure the SBC’s GPIO pins are properly aligned with the HAT’s header.
- Ensure that your Raspberry Pi is powered down before proceeding.
- Ensure that the coincell battery (if installed) is installed with the positive side (marked with
+) facing upward.
Before installing
Power off your Raspberry Pi to ensure that neither the SBC or the PiHAT are damaged.
Attach hardware
Follow the below pictures to position the PiHAT onto your SBC. The HSM and battery should be facing the Raspberry Pi and concealed from view.
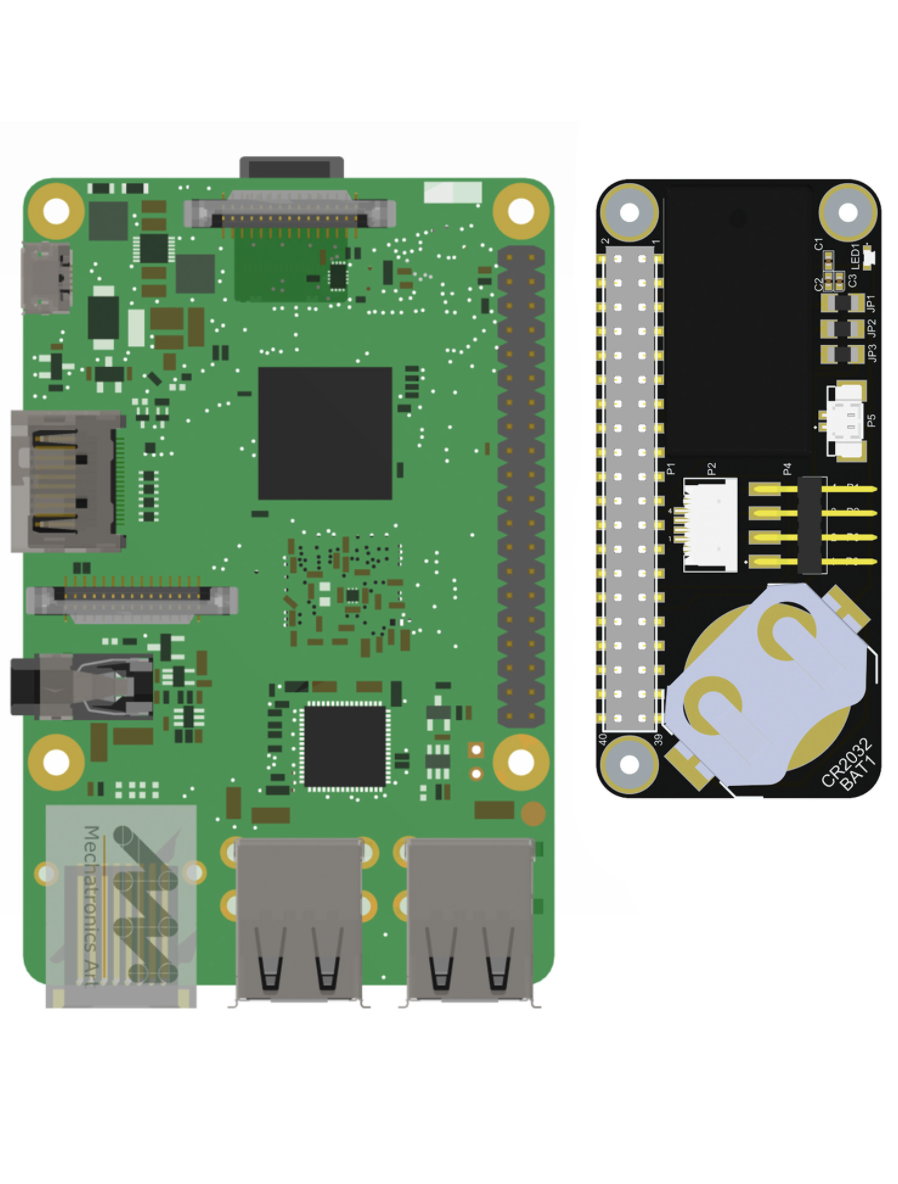
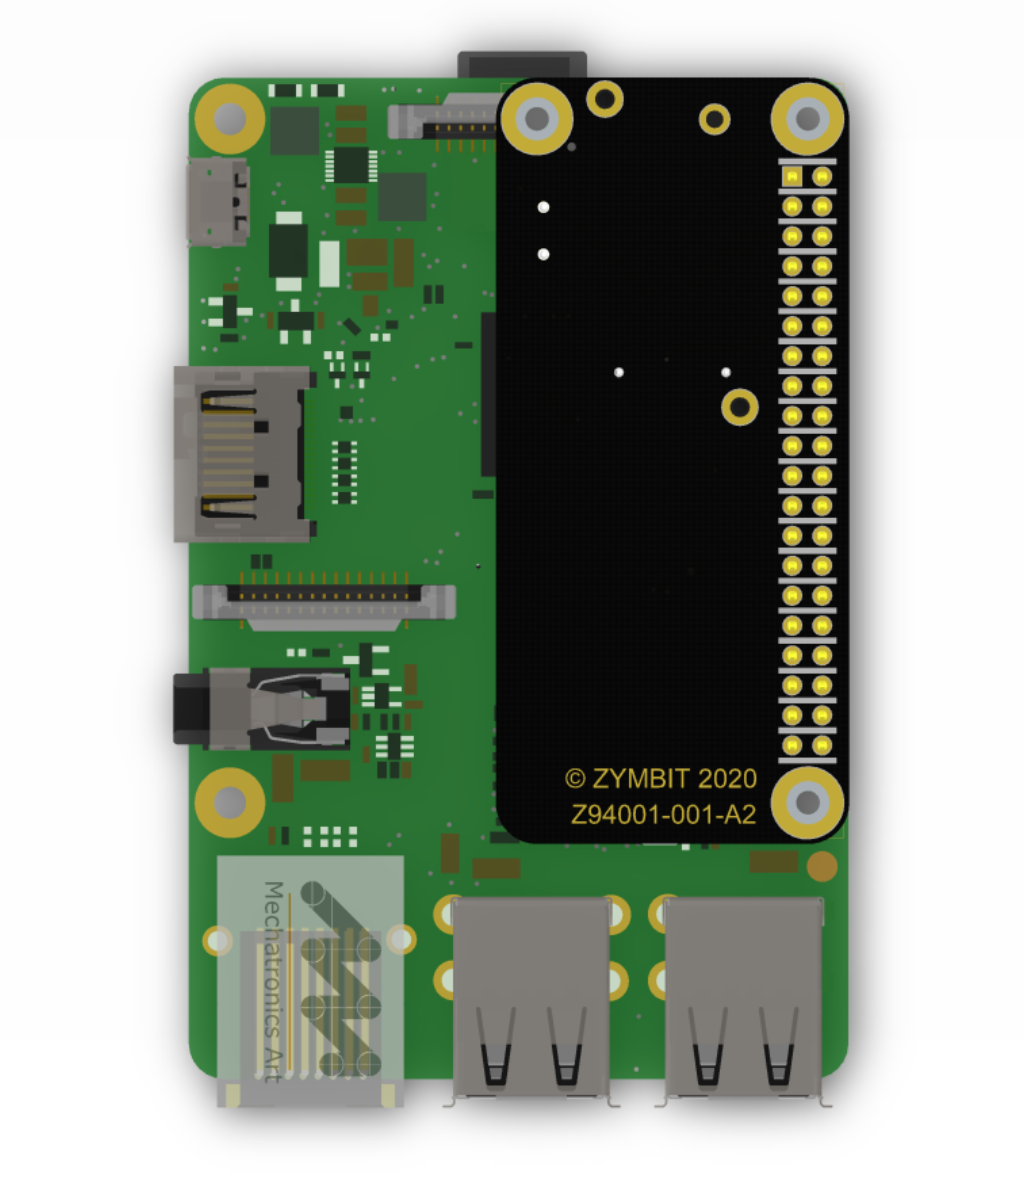
Be sure all the GPIO pins are aligned and have a respective slot. If misaligned, this could cause damage to the HSM, PiHAT, and/or your host device. Once aligned properly, press firmly down onto the header. Your PiHAT should fit relatively snug.
Power on and confirm operation
Power up the Pi and you will see a blue LED blinking rapidly and consistently (5 blinks per second). This indicates the HSM is operational but not configured.

If the blue LED blinks erratically, or not at all, then there is an installation error and you should check your connections.
Establish an I2C connection
For Raspian-based operating systems, you must configure the state of the I2C.
- Log in to your Raspberry Pi and run
sudo raspi-config. - Navigate to Interfacing Options -> I2C -> Would you like the ARM I2C interface to be enabled?
- Select yes, and confirm this choice.
Your I2C bus is now configured and ready to talk to the HSM. The default I2C address for the HSM is 0x30.
Your I2C bus is now on and ready to talk to the HSM.
Install the Zymbit Driver Package
Log in to your host device and follow these steps to install Zymbit Driver Package 2.x for your HSM4. The same steps upgrade a device that was set up with the legacy install_zk_sw.sh script.
Zymbit Driver Package 2.x requires a 64-bit OS: Raspberry Pi OS (Debian 12 bookworm or Debian 13 trixie), or Ubuntu 24.04 or 26.04. On Ubuntu 22.04, Debian 11, or a 32-bit OS, use the Driver Package 1.x instructions instead.
Download the Zymbit repository package. The file is saved under its versioned name, for example
zymbit-repo_2.0-1_all.deb:curl -fsSLOJ https://zk-repo.s3.amazonaws.com/zymbit-repo.debInstall it and refresh the package lists. This adds the Zymbit
aptsource and signing key, and removes the legacy zk-sw-repo source if one is present:sudo apt install ./zymbit-repo_*_all.deb sudo apt updateIf this device was set up with
install_zk_sw.sh, back up/var/lib/zymbitbefore continuing. If it is a deployed device, especially one with an encrypted filesystem, read Before you upgrade first.Install the driver, the encryption tools, and the Python API, then reboot:
sudo apt install zkifc zksaapps python3-zku
sudo reboot
To install only the packages you need, opt in to beta updates, or build applications against the Zymkey API, see Installing the Zymbit Driver Package.
Test the installation
After your device reboots, the Pi will perform an operation that will temporarily bind the HSM to your SBC. Once the HSM is bound to the SBC, the HSM’s blue LED should blink slowly–once every 3 seconds–to indicate that the binding is complete.
The quickest way to get started is to see the HSM’s various features at work by running these test scripts that were installed with the Zymbit Driver Package:
python3 /usr/share/zymkey/examples/zk_app_utils_test.py

python3 /usr/share/zymkey/examples/zk_crypto_test.py
Now you’re ready to start developing with HSM and Raspberry Pi. When it’s time to deploy your project, read our guide on enabling Production Mode: