Quickstart - Secure Edge Node
Overview
Secure Edge Node (SEN)- secure Linux compute platform engineered for a lifetime of reliable and compliant operation in zero trust environments.
Ideal for: Large-scale IoT deployments with edge gateways, edge servers, on-prem analytics and thin-clients.
See available models and packages here:
Configure and Setup your Secure Edge Node
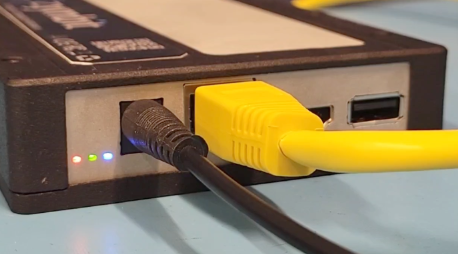
Power On
- Connect 12V Power Supply (available for purchase from Zymbit) up to the front panel 12V barrel connector. Optionally, supply power via PoE to the ethernet connector, or via the SATA edge connector.
- Connect an ethernet cable to the front panel gigabit ethernet port.
- The unit is designed to run headless. If you prefer, you do not need a monitor, keyboard, or mouse. Access is available via the conosole or SSH. The default hostname for Zymbit base images is zymbit-dev with a login/password of zymbit/zymbit. It is recommended that once you login, you set a unique hostname and change the password.
Boot Sequence
While powering up, monitor the Blue LED on end panel of the SEN. The total boot time as configured should take approximately 1-2 minutes from power on. It will go through the following stages:
- one slow blink: initializing the SCM
- one -> two -> three -> four blinks: Supervised Boot is verifying the signed file information
- rapid blinking: Supervised Boot successfully completed, booting underway
- blinking stops: USB bus enumeration found SCM; may stay off for seconds
- one blink every 3 seconds: zkifc has loaded and the system is ready to go
Example of Successful Supervised Boot LED Sequence (Click image for video)
Now you’re ready to start developing with the Zymbit Secure Compute Module. Follow along with the steps for the Protokits to get developing!
SEN 400 Proto Kit Getting Started
SEN D35 (legacy)Proto Kit Getting Started
Secure Compute Module
Inside the Secure Edge Node is the Secure Compute Module: a Zymbit Security Module + Hardware Wallet + Raspberry Pi CM4 integrated into a secure, encapsulated module. Details of the SCM itself including any other Zymbit specific cofigurations can be found here:
Using Secure Edge Node/SCM: API and Examples
- See API Documentation
- Working with Supervised Boot
- Securing the SCM further with the example Sanitization Script
- Working with the HD Wallet
- Setting up Tamper Detect